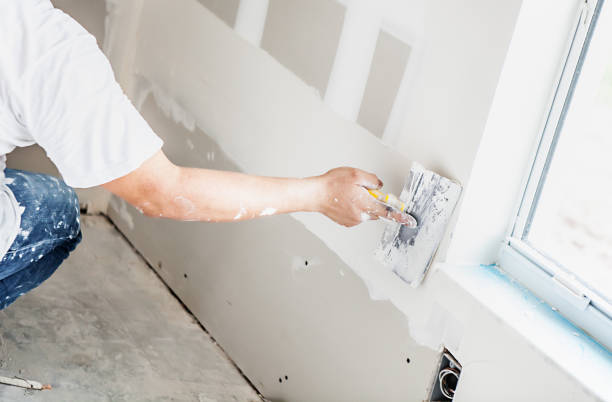
Drywall repair is an essential aspect of maintaining the beauty and integrity of your home. Whether it’s due to accidental damage, wear and tear, or water issues, knowing how to repair drywall can save you time and money. In this guide, we’ll cover everything you need to know about professional drywall repair in Evansville IN, from identifying issues to executing the repair process.
Understanding Drywall
What is Drywall?
Drywall, also known as gypsum board, is a construction material used to create interior walls and ceilings. It consists of a gypsum core sandwiched between two sheets of heavy paper. Drywall is favored for its ease of installation, versatility, and cost-effectiveness. However, it can be susceptible to damage from impacts, moisture, and mold.
Common Causes of Drywall Damage
Before diving into repair methods, it’s crucial to understand what causes drywall damage. Common culprits include:
- Nail Pops: As homes settle, nails can work their way out of the drywall.
- Water Damage: Leaks from pipes or roofs can cause sagging and discoloration.
- Holes and Cracks: Accidental impacts, such as bumping furniture or doors, can create holes.
- Mold Growth: Excess humidity can lead to mold forming on drywall surfaces.
Assessing the Damage
Identifying the Type of Damage
Before starting any repair, assess the type and extent of the damage. Minor dents or small holes can often be repaired quickly, while larger holes or water damage may require more extensive work. Here’s how to identify different types of damage:
- Small Dents or Scratches: These are usually surface-level issues that can be easily patched.
- Holes: Measure the size of the hole. Small holes (less than 1 inch) can be filled with spackle, while larger ones may need a patch.
- Water Damage: Look for discoloration, bubbling, or sagging areas, which may indicate a need for replacement.
Tools and Materials Needed for Repair
Gather the following tools and materials to ensure a smooth repair process:
- Utility Knife: For cutting drywall and trimming edges.
- Drywall Patch or Tape: Depending on the size of the hole.
- Joint Compound: For smoothing out repairs.
- Sanding Sponge or Paper: To create a smooth finish.
- Putty Knife: For applying joint compound.
- Paint: To match the repaired area with the surrounding wall.
Step-by-Step Guide to Drywall Repair
Minor Repairs (Holes Less Than 1 Inch)
- Clean the Area: Remove any loose debris around the hole.
- Apply Spackle: Use a putty knife to apply spackle directly into the hole.
- Smooth the Surface: Level the spackle with the wall surface using the knife.
- Sand Once Dry: Once dry, lightly sand the area to make it smooth.
- Paint: Match the paint color and apply as needed.
Moderate Repairs (Holes 1-4 Inches)
- Prepare the Hole: Use a utility knife to cut the edges of the hole into a square or rectangle.
- Cut a Patch: Cut a piece of drywall slightly larger than the hole.
- Attach the Patch: Secure the patch with screws to the existing drywall.
- Apply Joint Compound: Cover the patch with joint compound using a putty knife. Feather the edges to blend with the wall.
- Sand and Paint: Once dry, sand the area and paint to match the surrounding wall.
Major Repairs (Holes Larger Than 4 Inches)
- Remove Damaged Drywall: Cut out the damaged section using a utility knife.
- Install a Support Frame: Use wood or metal studs to create a support frame behind the wall.
- Attach New Drywall: Cut a piece of drywall to fit and attach it to the frame.
- Tape and Mud: Apply drywall tape over the seams and cover with joint compound.
- Sand and Finish: After drying, sand the area smooth and paint.
Preventing Future Damage
Regular Maintenance
Preventing drywall damage is often easier than repairing it. Here are some maintenance tips:
- Control Humidity: Use dehumidifiers in damp areas to prevent mold growth.
- Use Furniture Padding: Place padding on furniture to prevent accidental bumps.
- Routine Inspections: Regularly check for signs of water damage or wear and tear.
Best Practices for Installation
If you’re installing new drywall, ensure that it’s done correctly to minimize future repairs. Always follow the manufacturer’s guidelines and local building codes.
FAQs
How long does it take for joint compound to dry?
Drying time can vary based on humidity and temperature but typically ranges from 24 hours to 48 hours for each coat.
Can I paint over wet joint compound?
No, it’s essential to let the joint compound dry completely before painting. Otherwise, the paint may not adhere properly.
What if my drywall has mold?
If you discover mold, it’s crucial to address the source of moisture before repairing. For extensive mold, consider consulting a professional for safe removal.
Is it necessary to tape drywall seams?
Yes, taping is crucial to ensure a smooth finish and prevent cracks from appearing over time.
Can I repair drywall myself?
Absolutely! Many drywall repairs can be done by homeowners with basic tools and materials. However, for extensive damage, consider hiring a professional.
Conclusion
Drywall repair is a manageable task for homeowners willing to put in some effort. Understanding the types of damage, assessing the situation, and following proper repair techniques can restore your walls to their original condition. With the right tools and materials, you can tackle minor repairs on your own and know when to call in the professionals for larger issues. Maintaining your drywall not only enhances the appearance of your home but also protects its structural integrity.


